Prototyping your idea
So you have a list of user stories describing your idea. Now, let's translate those into things your users will actually see on screen.
We're going to create some prototypes. These can be made with code but, to keep things simple, we're going to use paper.
Usually, we'd go through many rounds of prototyping to avoid building the wrong thing. This isn't a course about agile delivery or user-centred design, so we're going to pretend we've already done all that.
What you need
Any kind of paper and pen will do. Some people prefer sharpies and A3 sheets, some people prefer pencils and notebooks.
Whatever you have on hand will probably be fine.

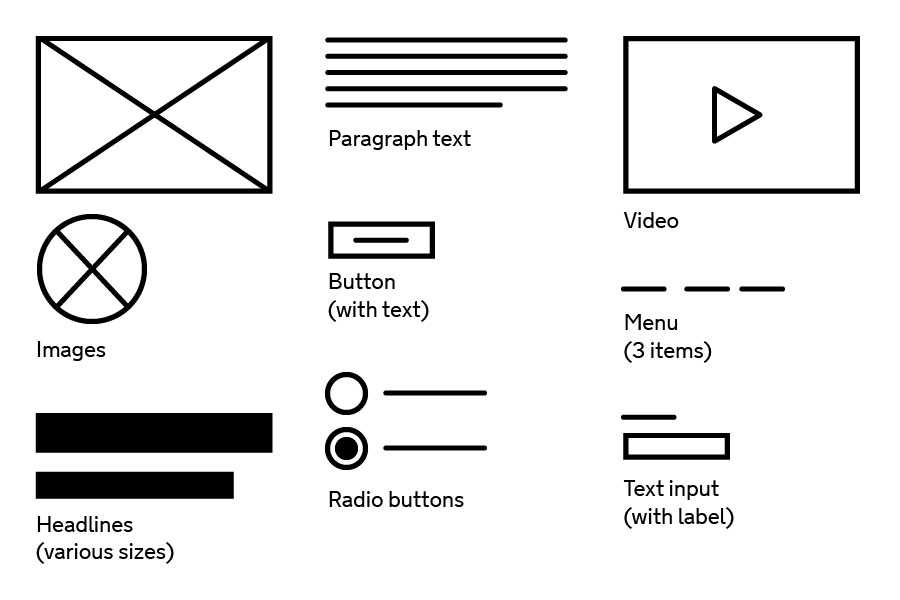
Common prototyping conventions
You can draw your prototypes in any way that makes sense to you, but here are some common conventions to get you started.
First, start by drawing the boundaries of your user's screen. You don't know how tall the screen you're designing will be, so only draw the top, left and right sides.
Starting at the top, draw the basic elements of your design: text, images, buttons, user input fields and similar. Don't worry about writing real text. That can be refined later.
Once you are happy with the prototype, annotate it in detail so that a stranger could understand it. This is important because:
- in agile teams designers rarely work in isolation and the whole team will need to understand and work with your designs
- it will help you remember why you made certain decisions
Keep these prototypes safe along with your user stories to refer back to later.
Make sure you've added enough detail to your annotations so your decisions will still make sense to you later on.
Service designers, user researchers and interaction designers often make use of the GDS prototyping kit to do this kind of work.
Completeness
It's not a good idea to start coding without a clear idea of what you want the result to look like.
Make sure that your prototypes have covered everything the user is likely to see on your app.
To do
Refer back to your user stories and draw a series of prototypes for your application.
Next we'll think about sharing and refining your work.
Part of Get started
- What you'll make
- How you'll learn
- An idea for your appP
- Describing your ideaP
- Prototyping your ideaP
- Share your workP